Wednesday, 4 February 2015

A Simple Guide on enabling WhatsApp Calling feature.

I'll show you a method by which you can enable WhatsApp calling feature in your WhatsApp,  before it's officially available.

Note- The beta testing of the calling feature has been shut by WhatsApp, so you will not be able to call anyone until further testing starts or its officially available.

Requirements- Rooted phone, WhatsApp version 2.11.508 or above, Android 4.2.2 or above.

Go here and download the latest version of WhatsApp available, as of writing this article the latest version is 2.11.512.

Now open any application similar to RootExplorer,  and navigate to the file as shown
/data/data/com.whatsapp/shared_prefs/com.whatsapp_preferences.xml

Open the file in edit mode and add this two lines before </map> in the file

Code:
<boolean name="call" value="true" />
<string name="call_allowed">all</string>


Now force stop WhatsApp and then launch it again or restart your phone.

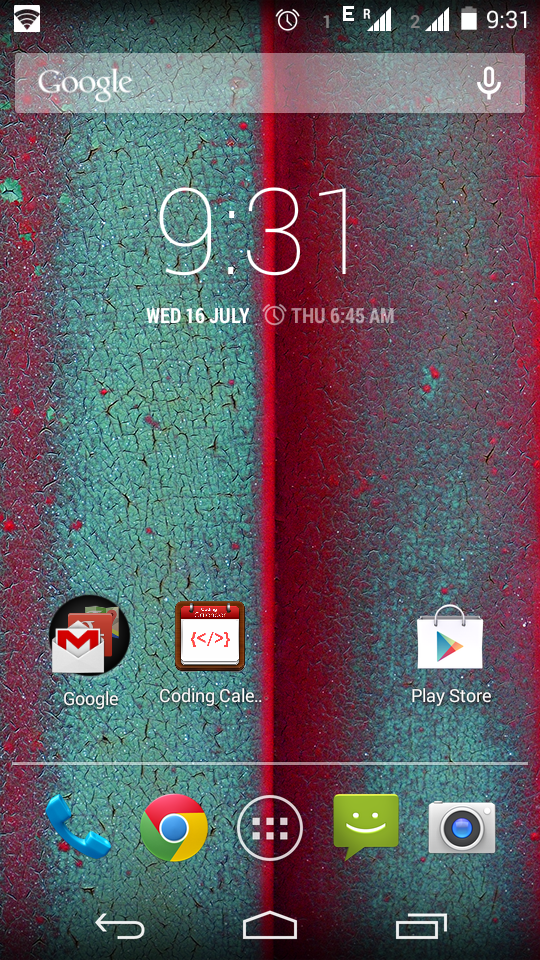
Below are some attached screen shots.
Tested on device Moto E- XT1022.(Android 4.4.4)


Credits to xda, official thread here.


Friday, 21 November 2014

Rooting Moto E(XT1022)

Hello guys, Welcome to TechJugaad Center, we're going to show how to root the Moto E today. Moto E is a budget smartphone, with really cool specs. I got mine from Flipkart. So head there if you want one. 

In this post we'll show you how to root the Moto E and install some cool apps that'll take the Moto E to the next level, the most cool feature that rooting will bring, is that, your Moto will be able to do screen recording. You've heard it right, screen recording. I have attached a video which i had recorded. Do check it out.

Downloadable Arena:(Download the stuff mentioned here from the links provided, please let us know of any dead links.)
1. mfastboot
2.SuperSu 
3.TWRP Recovery  (Rename it as recovery.img)
4.MotoE drivers  (Install them immediately)

First make sure you have unlocked the bootloader, use the link given below and follow the instructions given on the site.
Unlock Bootloader (You can use mfastboot instead of Android SDK)

 Note- You'll lose your warranty after unlocking the bootloader, and i'm not responsible if you brick your device in this process.

 Follow these steps-
1. Copy SuperSu to the SD card of your mobile.

2. Copy TWRP Recovery to the mfastboot folder.

3.Open command prompt and navigate to the mfastboot folder, or just navigate to the mfastboot folder first and hold Shift and then Right Click in empty space you'll get an option to open command prompt, this trick works in Windows 8. 

4.Turn off your phone and then hold the power button along with the volume down button for 10 seconds and then release them.

5.Connect your phone to your laptop or desktop via a USB cable.

6.In the command prompt type this command and hit enter
fastboot flash recovery recovery.img

 7. TWRP Recovery will begin and there choose the install option, navigate to the SuperSu, which you had earlier copied to the SD card. 
  
 8.Your phone will restart and presence of SuperSu app indicates that you have successfully rooted your device.


SuperSu App, the status bar and navigation bar have been tweaked using the apps given below.


Now to tweak the looks of your Moto E follow the steps given below.

Now download this app
1.Xposed Installer

Once you've installed Xposed Installer, go to the frameworks option and install the framework, then reboot your device.

Now depending on your choice download any app from the Download section of the Xposed Installer, there are many apps with description of the functions they perform.

These two apps are used by me, so i'll recommend them if you're still stuck on KitKat and have not received the Lollipop update-
1.AndroidL Navigation 
2.GravityBox[KK]

BeforeXposedInstaller


After using XposedInstaller


AndroidL Navigation will change the KitKat navigation buttons and put Lollipop navigation buttons.
GravityBox is a powerful app that has the capability to change the overall look of your Moto E, also you can make customisations to the feature of Screen Recording.


Hope this post helped you, leave your comments below if you get stuck anywhere.

Sunday, 27 July 2014

Chat bot for Windows

                 Creating a chat bot for windows from scratch.

This post is for people who want to create a chat bot from scratch, the basic requirement is only a PC and an internet connection.

The program for chat bot is written in Python and the knowledge base of the bot in AIML, so see that you have a basic knowledge of the two languages. Download Python (3.4), AIML (not required if you don't want to change the knowledge base of the bot)

Before beginning you need to know how AIML is used and how it enables the bot to talk.(Skip this part if you're not much interested with the details)
The bot responds to particular responses, the conversation which trigger the appropriate response are written using aiml, and saved in a file with .aiml extension. It's like instructing the bot to say "hello" only when someone says "hi". Responses are written in the .aiml file, the files can grow in number and require lot's of time to compile and load hence they are all combined into a .brn file(There is a program which does this, here) which is loaded in the beginning.

The basic working of the bot is in this way, first Speech to Text conversion is done(using speech module of python), the text is then sent as input to the bot. The bot sends an appropriate text as output, depending on it's brain file, the text is then converted to speech using the Windows built in text to speech converter. 
Other details are given with the code, in form of comments, which is sufficient to understand the entire program.

Things to download-
1. PyAIML
2. Speech Module(Download the .tar file extract it to the folder where python is installed, open a command prompt there and type the following-python setup.py install)
3. pyttsx(It's installation is similar to that of speech module).

The code is present here, it's only of few lines. The speech to text converter is not that great and hence you'll find the bot responding in a funny way. The solution to this is to use Google Speech to Text converter. I've tried that but i was not able to do it, got stuck with audio and flac file stuff. To change the bot's response just change the .brn file the bot will start interacting in a different way.

It's done, now give the bot a name and start chatting with it.

Hope you enjoy chatting with the bot.
*There is a Omegle Chat bot which i've made, make sure that you check it out, here.

Saturday, 19 July 2014

Unlocking Bootloader of Moto E(XT1022)

This guide is for beginners who want to unlock the bootloader of MOTO E.

Before starting let's get familiar with some common technical terms and learn something about the bootloader. If you're already familiar with the bootloader and other technical terms than skip this portion and go to Step 2.

Step 1-Things to know before unlocking the bootloader.

_________________________________________________________________________________

*What is a bootloader and why is it locked?
-> Bootloader is the first program that runs when you start your device. It contains the information of the stock ROM(ROM is similar to OS of computer like Windows and Linux). It is responsible for starting the booting of the ROM. The bootloader is locked, means that you cannot put any other custom ROM on your device. If you try to flash a different ROM, that is like you're trying to install different OS. Then your device might get bricked, it means it'll be totally useless and it can only be used as a paper weight.

Now you may ask why companies lock the bootloader, the bootloader is locked for security purposes. To prevent malicious ROMs from being installed. The average person doesn't have much knowledge of how the things are working under his device, so for the security of such people it's usually locked.

Must know Terms-
* Stock ROM- The original ROM which comes with the device.
*Custom ROM- ROM's which are modified and enable you to have root access.
*Flashing the device- Installing custom ROMs or kernels.

*Why to unlock the bootloader?
-> The bootloader is unlocked to enable an user to install custom ROM and gain root access. In short the first step in rooting the device is to unlock the bootloader. Root access on a device means that you can modify almost every system file present in the device. Which can be dangerous if the person doesn't know what he's doing, which is another reason why the bootloader is locked as people may totally screw up their device and it's the company who'll get a bad reputation for it.

Unlocking the bootloader voids your warranty, but you can relock the bootloader, provided your still having the stock ROM.

Usually developers are the people who unlock the bootloader to play with their devices. Nowadays everyone wants root access this is the sole reason why people consider unlocking the bootloader. But beware that rooting a device has it's own drawbacks.

Must know Hack- Suppose you mess up your device and it's still in warranty period, then flash the stock ROM, relock the device and take it to your nearest service center. They wouldn't know a thing and would help you with your device.

_________________________________________________________________________________

Step 2- Unlocking the bootloader

Prerequisite- Download these files Android, Drivers.

You don't have any need to download anything from the website.

1. Go to this site and read the instructions given there for the sake of reading and proceed to making an account or sign in using Google+ id.

2. Turn off your device and then push the volume down button and while holding it push the power button, afterwards release them simultaneously, the device will enter fastboot mode. Connect your device with the PC.

3. Now go to the folder Android which you've downloaded earlier
hold shift and press the right click of your mouse and select open command prompt here option.

4. Now type fastboot oem get_unlock_data, you'll get some strings. Don't panic if you don't get anything here, probably the drivers are not probably installed. Try restarting the PC and then continuing.

5. Right click and select mark and copy the five lines of strings, be careful to not consider the white spaces.

6. Paste the string on the site and request an unlock key, i've tried with my MOTO E and i was unsuccessful in the first attempt when i pasted the string along with the blank spaces. So you're gonna get an unlock key just be sure that you're pasting the right length of string without any white spaces.

Half the battle has been won.

1. You'll get a mail containing the unlock key of the device.

2. Click on the link given in the mail.

3. Again put your device in fastboot mode as you did earlier, pressing the power button while holding the volume down button and connect it with the PC.

4. Now type fastboot oem unlock THE_KEY_You_Recieved

5. If all goes well you'll get a message on your device that your bootloader is unlocked.


The message will always be seen by you whenever you restart your device. 

And there you have it, your device with an Unlocked Bootloader. Now you can proceed to root it or install Custom ROM of your choice.

**Note-1. You'll lose all the data present in the internal storage after completing of this operation.
2. You continue to receive updates after unlocking of the bootloader.

Tuesday, 25 February 2014

Rooting Samsung Galaxy i5503

Rooting a phone has many advantages, to list a few, you'll be able to run apps that require access to system files, change the default bootscreen, tweak system settings, explore the system files and much more.

This method of rooting, which i've listed, involves installing a custom rom(CyanogenMod) via ClockWorkMod (CWM) recovery. So basically you'll lose the stock rom and also lose the warranty of your device.  But in return you'll get rooted phone and Android Gingerbread os.

*Perform the following steps carefully i am not responsible for bricked devices.

*Before beginning see that you know how to boot into CWM recovery, on your stock rom. If you don't have any idea then see this post.
After booting into CWM recovery see that you make a backup of the stock rom, choose back up option. After that boot your phone normally.

1.Download files from here
2.Extract the content of the above file to the SD card of your phone
3.Now boot your phone into CWM recovery
4.Select Wipe Data
5.Select Wipe Cache Partition
6.Go into advanced and select Wipe Dalvik Cache
7.Also in advanced option select Wipe Battery Stats
8.Then select install zip from SD card
9.Select update-cm-7-20120518-madteam-galaxy5-signed.zip
10.Then Select TouchWiz_3.0_port_v0.7.zip
11.After that select gapps
12.Now select Wipe Data
13.Select Reboot into System

If all is well then you'll boot into CyanogenMod.


**If you experience bootloops then go to this link.
Register there and get the baseband file of your region. Then flash the baseband using Odin.
To flash a baseband refer this.
Over there instead of selecting CWM file, select the baseband file which you've downloaded.

Then repeat all the steps given here starting from step no 3.


If you're not able to go around the problem of bootloop or if you don't like CyanogenMod. Then select the restore option from CWM recovery and select the backup which you've had made earlier. This will make sure that you've at least a working phone.

Post your questions below
Know Jugaad. Powered by Blogger.